Step-by-Step Instructions
Ready to make the flakiest, most buttery pie crust you’ve ever tasted? Follow these easy steps:
Step 1: Chill Your Ingredients
Cold ingredients are key to a flaky crust. Make sure your butter and water are chilled before starting. You can even pop your flour in the fridge for 10 minutes if your kitchen is warm.
Step 2: Mix the Dry Ingredients
In a large mixing bowl, whisk together the flour and salt (and sugar, if using). This ensures the salt and sugar are evenly distributed throughout the dough.
Step 3: Cut in the Butter
Add the cold, cubed butter to the flour mixture. Use a pastry cutter, fork, or your fingers to cut the butter into the flour until the mixture resembles coarse crumbs with pea-sized pieces of butter. These butter pieces are what create those irresistible flaky layers.
Step 4: Add the Ice Water
Sprinkle 1 tablespoon of ice water over the mixture at a time, gently mixing with a fork or your hands after each addition. Stop adding water when the dough begins to come together in a shaggy mass—it should hold together when squeezed but not be overly wet or sticky.
Step 5: Form the Dough
Divide the dough in half (for a double-crust pie) or leave as one piece (for a single-crust pie). Shape each portion into a disc, wrap tightly in plastic wrap, and refrigerate for at least 30 minutes. Chilling the dough relaxes the gluten and firms up the butter, ensuring a tender crust.
Step 6: Roll Out the Dough
On a lightly floured surface, roll out one disc of dough into a circle about 1/8-inch thick and 2 inches larger than your pie pan. Carefully transfer the dough to the pan, pressing it gently into the edges. Trim any excess dough, leaving a slight overhang for crimping.
Step 7: Blind Bake (Optional)
If your recipe calls for a pre-baked crust (like for cream pies), prick the bottom with a fork, line it with parchment paper, and fill with pie weights or dried beans. Bake at 375°F (190°C) for 15 minutes, then remove the weights and bake for an additional 5–10 minutes, or until golden brown.
Step 8: Assemble and Bake
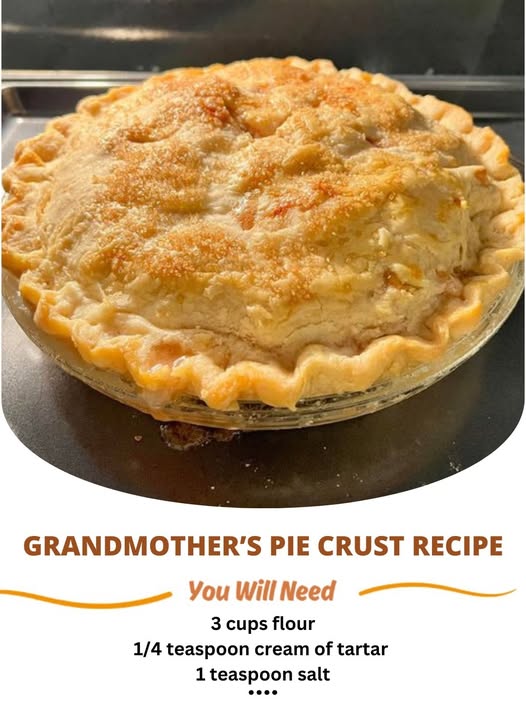
Fill your pie crust with your favorite filling, top with a second crust if desired, and bake according to your pie recipe’s instructions. For a shiny, golden finish, brush the top crust with an egg wash (1 egg beaten with 1 tablespoon water) before baking.
Why This Recipe Works So Well
The magic of this pie crust lies in its balance of ingredients and technique. The cold butter creates pockets of steam during baking, which results in flaky layers. The minimal handling of the dough prevents gluten development, ensuring a tender texture. And the simple combination of flour, butter, salt, and water proves that sometimes, less is more.
Variations to Try
While the classic version is divine, here are some creative ways to switch things up:
- Herb-Infused Crust : Add fresh herbs like thyme or rosemary to the dough for a savory twist—perfect for quiches or pot pies.
- Whole Wheat Option : Substitute half of the all-purpose flour with whole wheat flour for a nuttier flavor and added nutrition.
- Gluten-Free Version : Use a gluten-free flour blend to make this crust suitable for dietary restrictions.
- Cheese Crust : Mix in 1/2 cup of grated parmesan or cheddar cheese for a rich, cheesy crust.
- Sweet Crust : Increase the sugar to 2 tablespoons for extra sweetness in desserts like pecan or pumpkin pie.
Tips for Success
- Keep It Cold : Cold butter and ice water are essential for a flaky crust. Work quickly to prevent the butter from softening.
- Don’t Overwork the Dough : Handle the dough as little as possible to avoid toughening it. A shaggy, slightly crumbly texture is perfectly fine.
- Use a Light Touch : When rolling out the dough, use gentle pressure to maintain those flaky layers.
- Patch Imperfections : If the dough tears, simply patch it with a bit of excess dough and press gently to seal.
- Freeze for Later : Extra discs of dough can be frozen for up to 3 months. Thaw in the refrigerator before rolling out.
Serving Suggestions
This Grandmother’s Pie Crust is incredibly versatile and pairs well with a variety of fillings. Here are some ideas to inspire your next creation:
- Sweet Pies : Apple, cherry, peach, pumpkin, pecan, or lemon meringue.
- Savory Pies : Chicken pot pie, shepherd’s pie, or quiche Lorraine.
- Tarts : Fill with fresh fruit, custard, or chocolate ganache for an elegant dessert.
- Hand Pies : Cut the dough into circles, add your favorite filling, and fold into mini pies for a portable treat.
- Decorative Crusts : Use cookie cutters to create shapes for the top crust, or braid strips of dough for a rustic look.
Final Thoughts
With its flaky layers, buttery flavor, and timeless appeal, Grandmother’s Pie Crust is a recipe worth mastering. Whether you’re baking for a holiday feast, a family dinner, or simply indulging in a slice of pie, this crust will elevate any dish to new heights.
So, the next time you’re craving a homemade pie, give this tried-and-true recipe a try. Trust us—it’s quick, easy, and absolutely delicious!
Have you tried this recipe yet? Share your thoughts, tips, and variations in the comments below. Happy baking! 🥧✨

