Step-by-Step Guide to Making the Christmas Pavlova Tree
1. Preparing the Meringue:
Meringue forms the base of your Pavlova tree, and it’s crucial to get it just right. The key to a perfect meringue is the proper whisking of egg whites to stiff peaks and ensuring that the sugar is completely dissolved.
Instructions:
- Preheat the Oven: Start by preheating your oven to 225°F (110°C). Line two baking sheets with parchment paper to prevent the meringue from sticking to the tray.
- Whisk the Egg Whites: In a clean, dry mixing bowl, whisk the egg whites on medium speed using a hand mixer or stand mixer until soft peaks form. This means that when you lift the whisk, the egg whites should form peaks that gently curl at the tips.
- Add Sugar Gradually: Begin adding the granulated sugar, one tablespoon at a time, while continuing to beat the egg whites. Be patient and allow the sugar to fully dissolve before adding more. This will help create a glossy, smooth meringue.
- Beat to Stiff Peaks: Once all the sugar is added, increase the mixer speed and continue to whisk until stiff, glossy peaks form. The meringue should be firm enough that it doesn’t collapse when you remove the whisk.
- Add Vinegar, Vanilla, and Cornstarch: Gently fold in the vinegar, vanilla extract, and cornstarch. The vinegar helps stabilize the meringue, while the cornstarch will give the Pavlova its signature marshmallow-like interior.
Pro Tip:
To check if the meringue is ready, take a small amount between your fingers. If the sugar has dissolved completely and feels smooth, you’re good to go. If you feel any grit, keep beating until the sugar is fully dissolved.
2. Shaping the Meringue Layers:
To achieve the Christmas tree shape, you’ll need multiple layers of meringue. Each layer will be a different size, with the largest layer at the bottom and the smallest at the top to mimic the shape of a tree.
Instructions:
- Draw Circles on Parchment Paper: Use a pencil to draw circles on your parchment paper to serve as guides for the meringue layers. The sizes could be around 6 inches, 5 inches, 4 inches, and 3 inches in diameter, but you can adjust these sizes based on your desired tree shape.
- Shape the Meringue: Spoon the meringue onto the parchment paper and use a spatula to shape it into even, smooth circles. Be sure to shape each layer as evenly as possible.
- Bake the Meringue: Place the meringue layers into the preheated oven and bake for 90 minutes. Do not open the oven door during the baking process, as this could cause the meringue to collapse. After the time is up, turn off the oven and allow the meringues to cool completely inside the oven. This step helps ensure that the meringue remains crisp and prevents it from cracking due to rapid temperature changes.
Pro Tip:
If you’re unsure whether the meringues are done, gently tap the surface. If it sounds hollow and feels dry, they are ready.
3. Whipping the Cream:
While the meringue layers cool, it’s time to prepare the whipped cream topping. The whipped cream should be light and fluffy to balance the sweetness of the meringue.
Instructions:
- Chill the Bowl and Whisk: For best results, place the bowl and whisk attachment in the fridge for 10-15 minutes before whipping the cream. This helps the cream whip up faster and holds its shape better.
- Whip the Cream: Pour the heavy whipping cream into the chilled bowl and beat on medium-high speed. Add the powdered sugar and vanilla extract once the cream begins to thicken.
- Soft Peaks: Continue to beat the cream until soft peaks form. This means the cream should hold its shape but still be soft and pillowy, not stiff.
4. Assembling the Christmas Pavlova Tree:
Now it’s time to assemble your Christmas Pavlova Tree. You’ll layer the meringue discs with whipped cream and top them with fresh fruits to create a festive, beautiful display.
Instructions:
- Start with the Largest Meringue Layer: Place the largest meringue layer on a large serving platter or cake stand. Spread a generous layer of whipped cream on top.
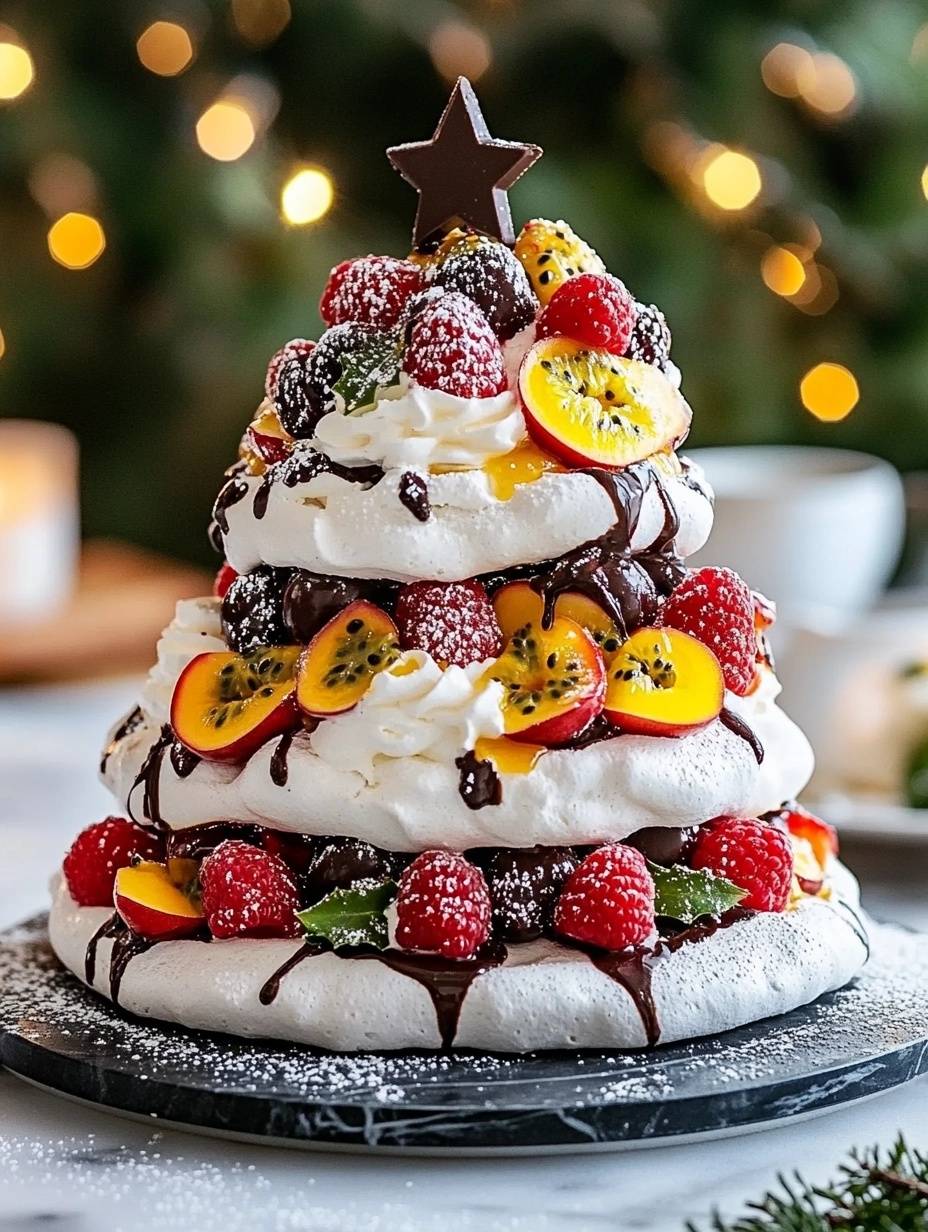
- Add Fruits: Scatter fresh raspberries, halved strawberries, and passion fruit pulp on top of the whipped cream. These fruits will add a burst of color and natural sweetness that pairs wonderfully with the meringue.
- Add More Layers: Continue stacking the meringue layers, offsetting them slightly to create the tiered effect of a tree. For each layer, spread whipped cream and top with more fruit.
- Top with the Smallest Layer: Finish the assembly with the smallest meringue layer at the top.
5. Decoration and Final Touches:
Once your Pavlova tree is assembled, it’s time to make it sparkle with festive decorations.
Instructions:
- Chocolate Star: Place a chocolate star on top of the smallest meringue layer. You can either use a store-bought chocolate star or make one at home by melting chocolate and spreading it onto parchment paper to harden before cutting it into a star shape.
- Dust with Powdered Sugar: Lightly dust the entire Pavlova tree with powdered sugar for a snowy effect. This makes it look even more magical and festive.
- Chocolate-Dipped Strawberries: For an extra touch of elegance, dip some strawberries in melted chocolate and place them around the base or between the layers of the Pavlova tree.